


In first article of this series which we call “Rooting for Newbies,” we spent a good deal of time explaining what rooting was and what it meant to gain root access to an Android device. Basically, gaining root access is actually allowing the user to gain elevated permissions or “superuser” access to the root directory of the device, which usually results in being able to run apps and features that are otherwise unavailable to a stock user. This time, we get down to the nitty-gritty and tell you how to actually gain root access to your device.
Technically speaking
When you get down to the technical side of it, the process of gaining root is easily described. As a user, you will want to install an app that allows you “superuser” privileges every time an app (usually unapproved ones) requires it. You will want to gain root access because these apps that bring out the potential of your Android device usually taps into folders and system resources that would usually be blocked by stock versions of the Android operating system.
Such an app – like Chainfire’s popular SuperSU – would modify the boot partition of the operating system so that root access can be gained. But things are not as simple as they are in technicalities – there are a number of steps to take before you can install an app like SuperSU.
Prepping for Rooting
Back up everything that’s important to you before you start. Gaining root access is basically tweaking with how the operating system was designed by Google and the manufacturer to run correctly. Changing things here means hacking into the system, and it may result in fatal failure of the software at best, bricking your device at most. It is important that you don’t lose valuable data in this process, so back up anything that is valuable to you.

There are two settings you will need toggled before starting the process – USB Debugging and OEM Unlocking. USB Debugging can be accessed through your phone’s developer options. The problem is that this part of the settings menu is usually hidden. Un-hiding it is easy – go into the About Phone section of your Settings menu, and tap the Build Number info seven times. This usually unlocks the developer options menu. From there, you can toggle USB Debugging first to “on”, and you can also toggle OEM Unlocking.
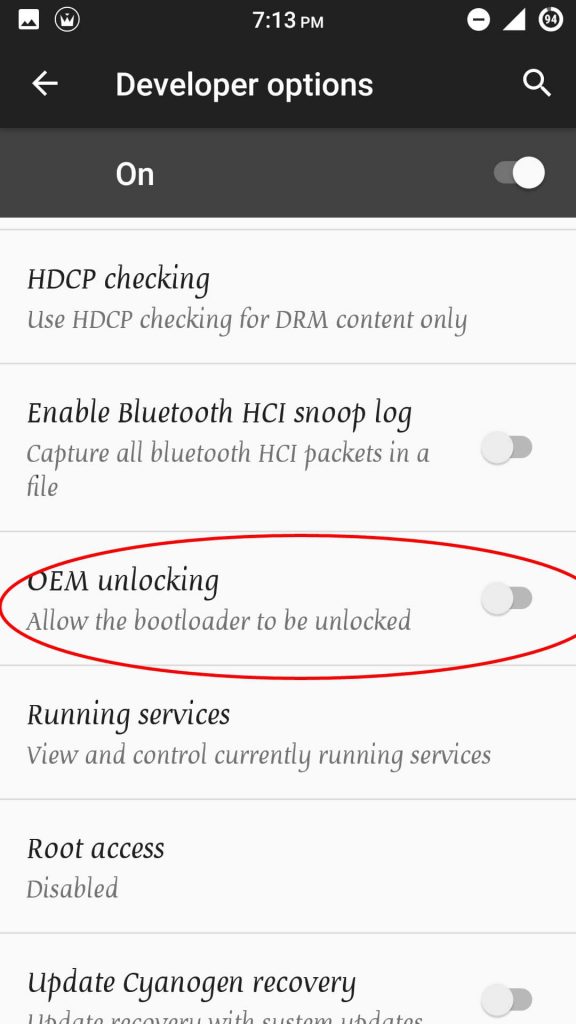
The latter setting is to allow you to unlock the bootloader of your device, which is described in the next step.
Unlocking the Bootloader
This is where it gets complicated. Manufacturers differ in the way they approach bootloader unlocking. Some are very lenient and put on unlock toggles in their phones – like OnePlus, and the Nexus developer edition phones. Some will allow you to unlock the bootloader, but will require you to check with them first, like Sony, HTC, and Motorola. And then there are manufacturers like Samsung, LG, ASUS, and others who rarely provide a way to unlocking the bootloader of their devices.
– Motorola bootloader unlock program
– HTC unlock bootloader page
– Sony’s unlocking the bootloader instructions
If you have one of the former brands, you’re in luck, because unlocking the bootloader should be at least possible. If you have a device that does not allow for bootloader unlocking, you may have to dive into the XDA Developer Forums to search for a way to force bootloader unlocking for your device.
Rooting by installing SuperSU or similar apps
After unlocking your bootloader, there are two general ways you can go – either install a one-stop rooting app that takes care of the whole process, or flash SuperSU or any similar app. The former is easier – via apps like TowelRoot, Kingo Root, and KingRoot – but these are usually not guaranteed to work on the newer devices.
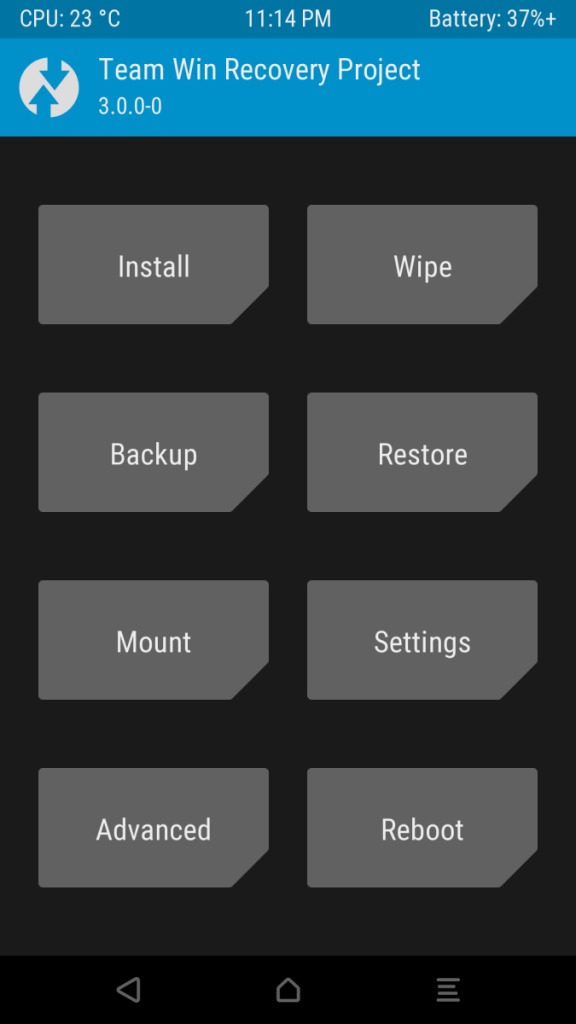
Installing SuperSU by Chainfire is one of the more popular ways to go about this. But first up, to flash SuperSU into your operating system, you will need to flash a custom recovery. Custom recoveries like TWRP and ClockworkMod will require you to download their files, and flash them to your device via fastboot (you need to have ADB installed). Flashing a custom recovery is a whole other set of instructions, but these are specific to a device and are relatively easy to find in XDA.
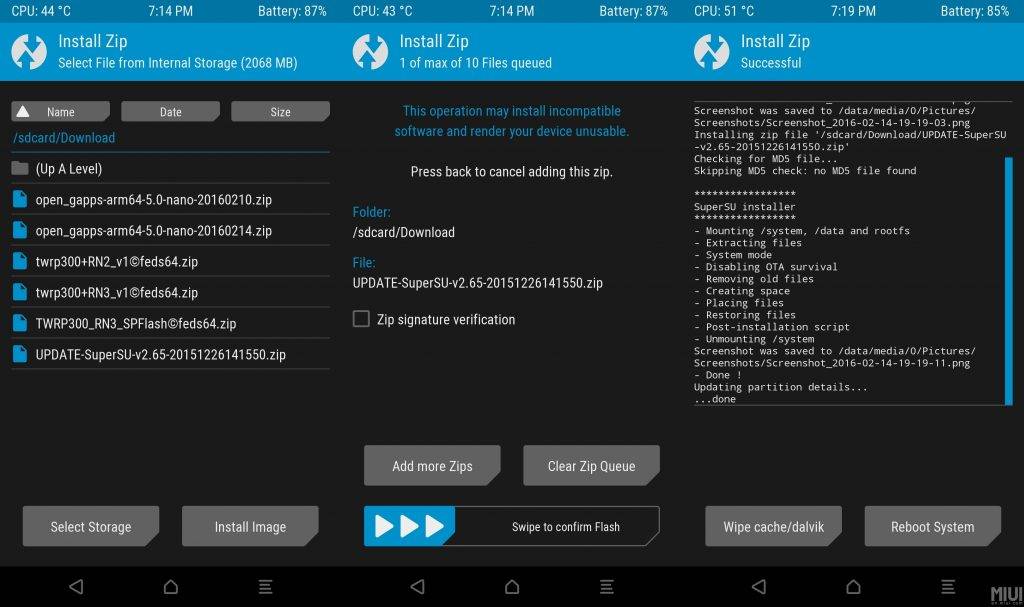
After installing a custom recovery like TWRP, you can already download the SuperSU zip file specific to your device – flashing an incompatible zip file will give you so much trouble – save it to your phone’s storage, and flash it via TWRP. Usually, your device will have root access after you flash SuperSU and reboot.
Final Instructions
Rooting is your gateway to unlocking the full potential of your Android device and getting rid of those annoying bloatware apps your manufacture installed on your phone. However, it can also cause you a world of hurt and hassle if you don’t do it correctly.
So a few reminders. First, do your research and try to find out how to unlock the bootloader for your device. Second, make sure you download the TWRP custom recovery specific for your device. Again, some research in XDA will go a long way here. Finally, make sure that you download the correct SuperSU zip file for flashing specific for your device. Flashing the wrong zip for a different device can actually lead to you losing usage of your device permanently.


